David has graciously added a couple new pumpkins for our viewing pleasure.
But first, a belated happy birthday: "Happy birthday, David!"
And happy birthday to David's wonderful new book, THE HAUNTED HAMBURGER AND OTHER GHOSTLY STORIES, illustrated by Paul Meisel.
Onto the new pumpkins . . .
And now, David's original post . . .
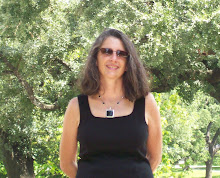
TOMB it may concern: Halloween is my favorite holiday. And it's especially BOOtiful this year because the amazing pumpkin carver, David LaRochelle, is in the (haunted) house.
Before we get to David's astounding pumpkins, here are 6-1/2 things you should know about him.
1. His hilarious novel, ABSOLUTELY, POSITIVELY NOT, won the Sid Fleischman Humor Award.
2. This year, he is promoting TWO brand new picture books -- this one and this one.
3. Reese Witherspoon read his book, THE BEST PET OF ALL, at the WHITE HOUSE!
4. David and I have something in common. We both create puzzles and have been published in GAMES Magazine.
5. David has won some amazing prizes in a number of contests. (Watch the video link at the end to hear about a doozie!)
6. Once a teacher, David now does MANY school visits each year.
6-1/2. David is one of the nicest people I've ever met.
6-1/2 WAYS TO CARVE A FANTASTIC PUMPKIN WITH DAVID LAROCHELLE . . .

1. Choose the right pumpkin. Check it all over (including the bottom) for soft spots, especially if you buy your pumpkin a week or more ahead of Halloween. More than once I've lost a lovely pumpkin to rot because a teeny, tiny brown spot blossomed into a huge, mushy, rotten patch. And don't shy away from odd-shaped pumpkins or pumpkins with "warts"; these can be inspiration for a unique design.
2. Choose the right tools. Sure, you can carve your pumpkin with a kitchen knife, but for easier cutting and more intricate designs, buy yourself one of the inexpensive pumpkin carving kits you can get at the grocery store (I use PumpkinMasters, but there are other brands). For some of my designs I use a Speedball linoleum carving tool (you can get these at an art supply store) to scrape away just the outside layer of flesh rather than carving all the way through the pumpkin skin.
3. Clean your pumpkin well. Scrape the insides until the surface that you'll be carving is about an inch thick. You can test it with a pin. If it's thicker than that, it will be hard to carve a recognizable design; if it's much thinner, the design might collapse.
4. Be creative! As you plan your design, don't limit yourself to faces. I've carved pumpkins with dragons, snakes, words, a clock, the cover of one of my books, even a Halloween version of Grant Wood's painting "Amercian Gothic." Let your imagination go wild! And who says you have to limit yourself to Halloween ideas? Why not carve a flower, music notes, or even a happy hamster? And sometimes the simplest designs, such as a single question mark, can be the most striking.
5. Transfer your design to your pumpkin. I draw my designs on tracing paper, then tape the paper to my pumpkin and prick along the lines with a straight pin. When I remove the paper, the pin pricks show my design.
6. Lighting your creation. I usually use multiple (up to six or seven) tea candles inside each pumpkin. It makes them glow like beacons, and in case one candle goes out, the pumpkin will still look good. I've also lit pumpkins with Christmas lights. A single blinking colored light inside a pumpkin gives a very creepy effect.
And finally, 6 1/2. Don't worry about perfection. If your knife slips while carving, it will probably give your pumpkin more character. Some of the favorite pumpkins I've seen in the neighborhood are ones with lopsided mouths or mismatched eyes.


To watch David carve a pumpkin and discuss some of his unique carving experiences and amazing contest wins, click here. To go to David's pumpkin-carving page on his site, click here. To learn more about David LaRochelle, click here.
Here's hoping everyone has a Halloween to DISMEMBER. (Insert evil laughter here.)


